Fonts are lettering styles that can be installed on your computer. When installed, you can use them to change the aspect of letters in any file that you are creating or editing. However, when you open the same file on another computer, problems may appear with text if the font that you used is not installed on that other computer. The reason is that when a font is not installed, the software does not have the necessary information to properly read and edit text.
That is why fonts and text in your artwork file always need to be converted to outlines before saving and sending your file into production.
How to convert fonts to outlines
Careful: Before you begin this process, it is advisable to save your file under another name, since you will not be able to revert outlines to text at the end of the process.
Since Photoshop works with images (i.e. pixels) and not vectors like Illustrator, the process to outline fonts is called source rasterization.
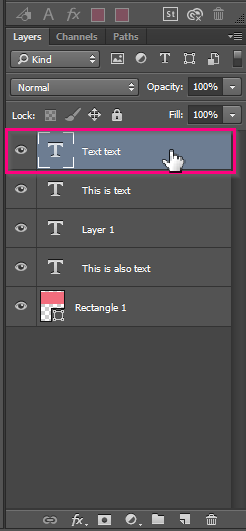
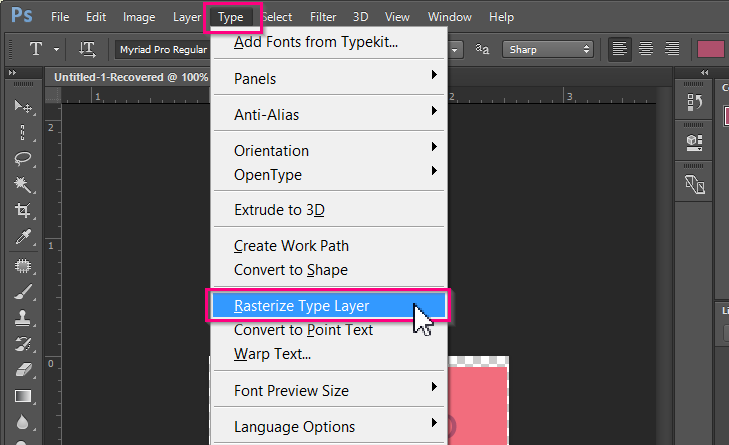
To rasterize text, there are two ways. First, in the Layers window, you can select the layers of text that you want to rasterize (hold the ctrl-key to select multiple at the same time):


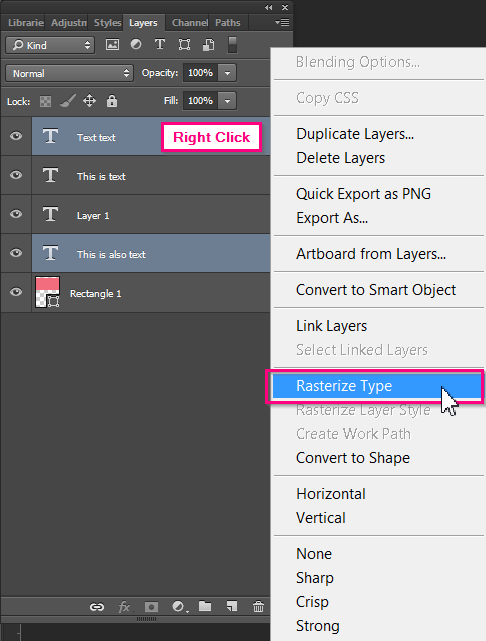
Alternatively, you can also right click after selecting the fonts in the Layer window, and click Rasterize Type:


