


STEP 1Choose Your Options
Need help configuring your product or preparing your artwork?
50490, Kuala Lumpur
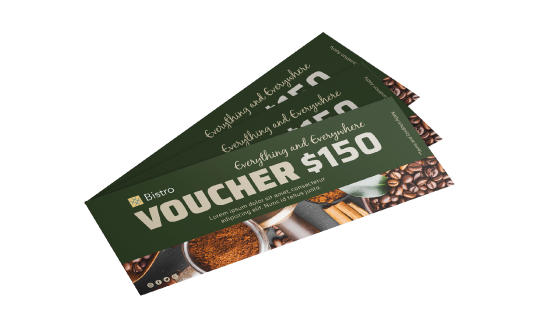
Premium Gift Vouchers
Format
Choose Format
Can't find the size you need?
Infos & Tips Experience our versatile Premium Gift Vouchers in two convenient sizes: the compact 9 x 5.4 cm format, perfect for easy distribution and quick access to promotions, and the bold 7 x 15 cm size, designed to make your offers stand out with ample space for eye-catching designs. Both options are customizable, printed on high-quality materials, and ideal for various applications, from retail promotions to event tickets.
Elevate your marketing strategy and enhance customer engagement with our Premium Gift Vouchers.
Experience our versatile Premium Gift Vouchers in two convenient sizes: the compact 9 x 5.4 cm format, perfect for easy distribution and quick access to promotions, and the bold 7 x 15 cm size, designed to make your offers stand out with ample space for eye-catching designs. Both options are customizable, printed on high-quality materials, and ideal for various applications, from retail promotions to event tickets. Elevate your marketing strategy and enhance customer engagement with our Premium Gift Vouchers.
How to choose the perfect fit?
If you have a design, verify its dimensions using Adobe Acrobat's 'Check Document Property' function; discover more details here. Don't have a design yet? Utilize our templates tailored for the specified sizes.Side Of Print
Choose Side Of Print
Infos & Tips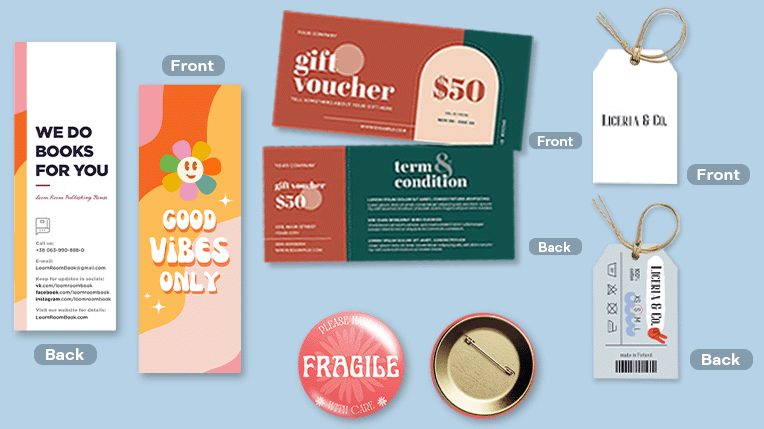 We offer single sided and double sided printing.
We offer single sided and double sided printing.Single sided or double sided printing?
Choose between single-sided or double-sided printing for your vouchers. Single-sided is cost-effective for simple designs, while double-sided maximizes space for more detailed content and a professional look. We provide full-color printing for vibrant, high-quality results.Paper Type
Choose Paper Type
Infos & Tips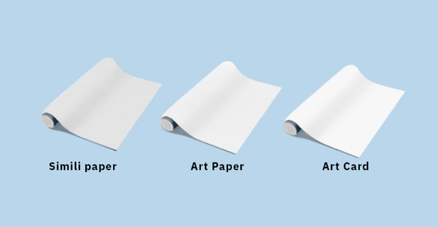 Discover a paper materials, each designed to meet your unique needs and preferences.
Discover a paper materials, each designed to meet your unique needs and preferences.Which paper weight should you choose?
We offer three premium paper options for vouchers: 210g, 260g and 310g art card. These high-quality art cards provide excellent durability and a smooth surface for vibrant, sharp prints. The 210g & 260g art card is ideal for a lightweight yet sturdy feel, while the 310g art card offers a thicker, more substantial weight for a premium, high-quality finish. All options ensure that your vouchers are not only visually appealing but also built to last, making them perfect for both promotional and personal use.Finishing
Choose Finishing
Infos & Tips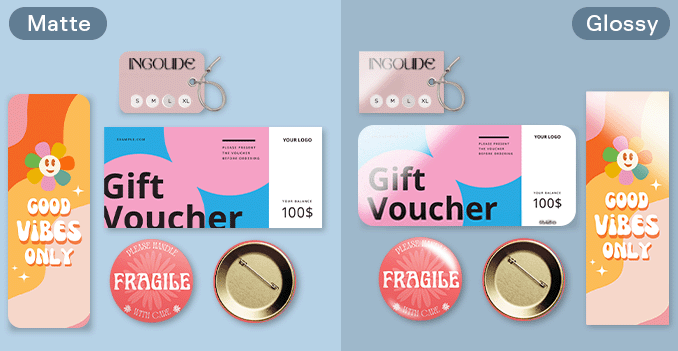 Experince our range of lamination options, designed to add a touch of refinement to your prints.
Experince our range of lamination options, designed to add a touch of refinement to your prints.Wondering how to choose the perfect finishing for your vouchers?
Enhance the look and feel of your vouchers with our premium finishing options. Choose from glossy lamination for a high-shine, vibrant finish that makes colors pop and adds extra durability, or matte lamination for a sophisticated, smooth finish that reduces glare and provides a more subtle, elegant appearance. For a polished, professional touch, we also offer round corner cutting, giving your bookmarks a sleek, modern shape. Alternatively, you can choose without lamination for a classic, natural finish. All options are designed to protect your vouchers and ensure they stand out in both design and quality.Perforated Line
Choose Perforated Line
Infos & Tips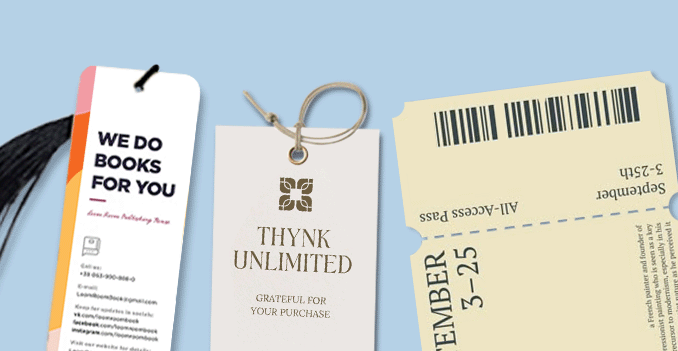 Custom your voucher with our cutting or perforated line.
Custom your voucher with our cutting or perforated line.Which cutting option for vouchers best suits your needs?
We offer two cutting options for our vouchers: traditional cutting for a clean, professional look and perforated lines for easy tearing and redemption. The traditional cut gives a polished edge, ideal for a sleek presentation, while the perforated option makes it easy for customers to access and use their vouchers.Add-ons
Choose Add-ons
Infos & Tips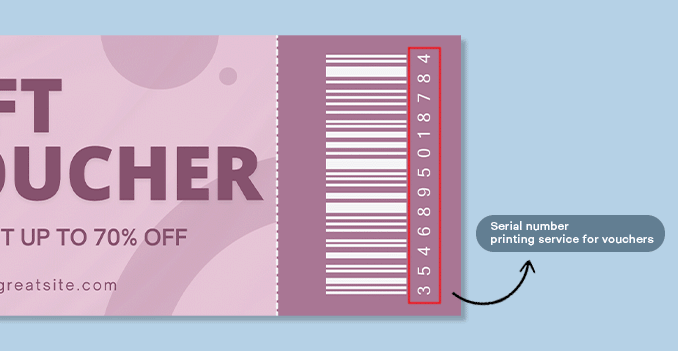 Choose your voucher with serial numbers or without!
Choose your voucher with serial numbers or without!Why your vouchers need a serial numbers?
We offer vouchers with serial numbers for easy tracking and fraud prevention, as well as vouchers without serial numbers for a more straightforward option. Select the one that best suits your needs and enjoy our high-quality vouchers designed to enhance your customer experience!STEP 2
Choose a Quantity & Delivery Date
Please select the price below to see the cutoff time.
Quantities
Receive your products by
100 pcs
200 pcs
300 pcs
500 pcs
1,000 pcs
2,000 pcs
3,000 pcs
5,000 pcs
10,000 pcs
Mon, 24 Mar
Fastest
Tue, 25 Mar
Wed, 26 Mar
Thu, 27 Mar
Cheapest
Can't find the quantity you're looking for? You can add a custom quantity you want
Set Custom Quantity


