custom printing services for Bookmarks

Print Bookmarks

Bookmarks are one of the most versatile marketing tools for any business. They are a quick and inexpensive way to share your contact details with business partners or new potential clients and play an important role in creating a lasting first impression.

Select one of the options below to get started

Upload Your Design

Click here to select your product options and to upload your print-ready artwork.

Let Us Design Or Adjust Your Artwork

Click here if you want us to design or you need help to create a ready-to-print file (e.g. editing of formatting).

Browse Our Templates

Select this option to browse our templates and create your artwork online

STEP 1Choose Your Options
Need help configuring your product or preparing your artwork?
50490, Kuala Lumpur
Bookmarks
Format
Choose Format
Can't find the size you need?
Infos & Tips
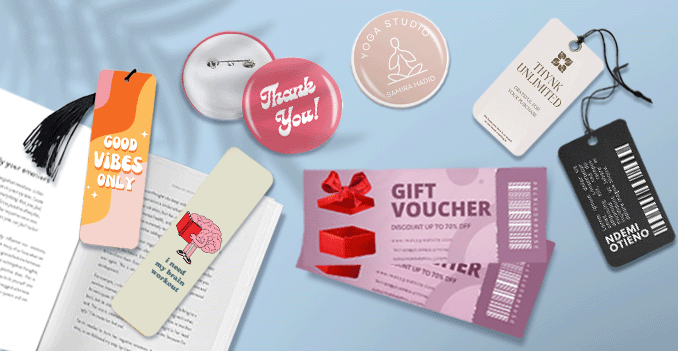
Experience our custom bookmarks in three versatile sizes: small, medium, and large formats, each designed to suit your unique needs. The small format is ideal for concise promotions or personal keepsakes, while the medium format provides a balanced size for showcasing artwork or branding. The large format offers maximum space for impactful designs, perfect for events or promotional campaigns. Made from high-quality materials and fully customizable, our bookmarks are a great way to make a lasting impression, whether for business, marketing, or personal use.
Enhance your reading journey with our quality Bookmarks.
How to choose the perfect fit?If you have a design, verify its dimensions using Adobe Acrobat's 'Check Document Property' function; discover more details here. Don't have a design yet? Utilize our templates tailored for the specified sizes.
Side Of Print
Choose Side Of Print
Infos & Tips
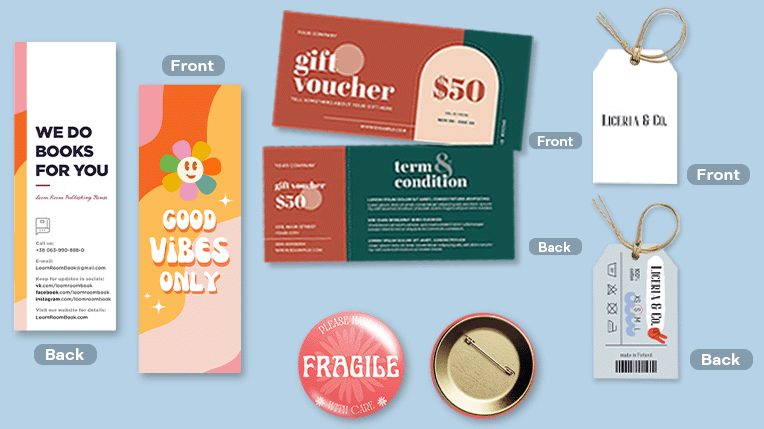
We offer single sided and double sided printing.
Single sided or double sided printing?Choose from single sided or double sided printing options for your bookmarks, depending on your content and preferences. Single sided printing offers a cost-effective solution, ideal for simple designs or messages, while double sided printing maximizes space and allows for more detailed content or creative designs on both sides, giving your bookmarks a more polished and professional look. We also offer full-color and black and white printing options, giving you the flexibility to select the best style for your project.
Paper Type
Choose Paper Type
Infos & Tips
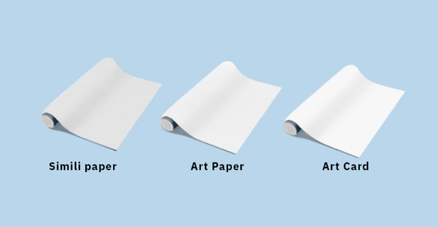
Discover a paper materials, each designed to meet your unique needs and preferences.
Which paper weight should you choose?We offer two premium paper options for your bookmarks: 260g and 310g art card. These high-quality art cards provide excellent durability and a smooth surface for vibrant, sharp prints. The 260g art card is ideal for a lightweight yet sturdy feel, while the 310g art card offers a thicker, more substantial weight for a premium, high-quality finish. Both options ensure that your bookmarks are not only visually appealing but also built to last, making them perfect for both promotional and personal use.
Finishing
Choose Finishing
Infos & Tips
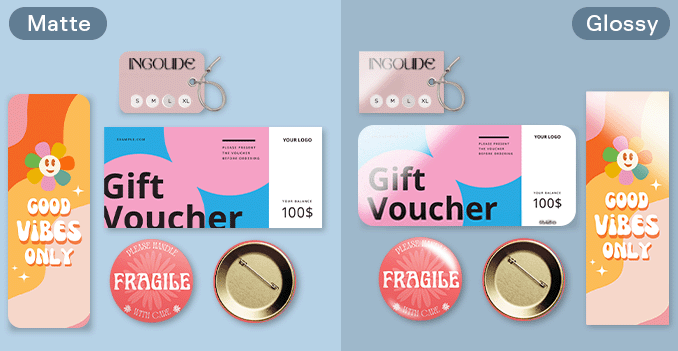
Experince our range of lamination options, designed to add a touch of refinement to your prints.
Wondering how to choose the perfect finishing for your bookmarks?Enhance the look and feel of your bookmarks with our premium finishing options. Choose from glossy lamination for a high-shine, vibrant finish that makes colors pop and adds extra durability, or matte lamination for a sophisticated, smooth finish that reduces glare and provides a more subtle, elegant appearance. For a polished, professional touch, we also offer round corner cutting, giving your bookmarks a sleek, modern shape. Alternatively, you can choose without lamination for a classic, natural finish. All options are designed to protect your bookmarks and ensure they stand out in both design and quality.
Hole Making
Choose Hole Making
Infos & Tips
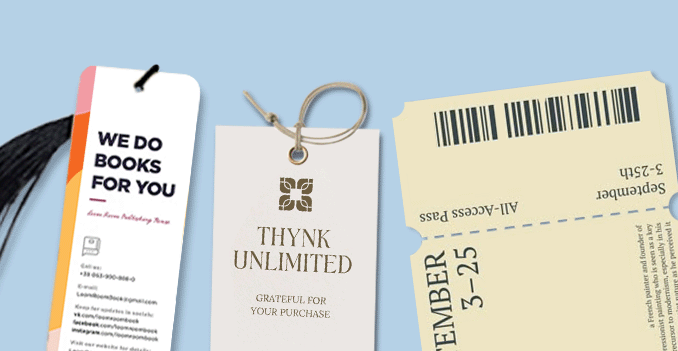
Customizable hole placement options for your bookmarks.
What is the best option for hole making?For added refinement, we offer a hole making option on your bookmarks, available in a variety of positions to suit your design preferences. Whether you're looking to create a convenient hanging loop or simply add a unique touch, our customizable hole placement options ensure your bookmarks stand out. Alternatively, if you prefer a clean, uninterrupted look, you can choose no hole, giving your bookmarks a classic, polished finish. Both choices are designed to enhance the overall aesthetic and functionality of your bookmarks, depending on your needs.
STEP 2

Choose a Quantity & Delivery Date

Please select the price below to see the cutoff time.
Quantities
Receive your products by
50 pcs
100 pcs
200 pcs
300 pcs
500 pcs
1,000 pcs
Mon, 14 Apr
Fastest
Tue, 22 Apr
Thu, 24 Apr
Cheapest
Can't find the quantity you're looking for? You can add a custom quantity you want
Set Custom Quantity

Product's quantity must be more than 50 pcs and less than 1,000 pcs. In the multiples of 50

Details about ordering Bookmarks

Information
Artwork Preparation

Please follow our artwork preparation guidelines to ensure that your artwork file is set up correctly.

  • 1. Add 3 mm of bleed

    During the production of paper products, slight cutting imperfections are to be expected - cutting can be off by a couple of millimeters from the cutting line. To allow leeway for such imperfections, you should add 3 mm of bleed on all edges of your artwork. Make sure all colors, background pictures, and elements extend to the edge of the bleed area, to avoid the appearance of white borders on certain edges after cutting. Learn more how to set up the bleed here.

  • 2. Keep your content within a 3 mm safety margin

    To ensure that no important elements (text, graphics, images) get cut off from your paper product, make sure to keep such elements at least 3 mm away from the edge of your finished product dimensions. Click here to know how to set up 3 mm safety margin.

  • 3. Use CMYK colour mode

    Except for silkscreen and pad printing, files should be prepared in CMYK colour mode. Keep in mind that if the setup is wrong, colours on the finished product may differ from the file you sent. Here is how to set your artwork to CMYK colour mode in Adobe Illustrator.

  • 4. Use an image resolution of at least 300 DPI

    To avoid blurriness, use only images and graphics that have a resolution of 300 DPI or more at actual size. Before sending your files, make sure to embed your images into the file. Read more about how to check the resolution of your assets.

  • 5. Use the right values for grey elements

    When setting up grey elements, set the black color (K) to a percentage between 0 and 100, and keep all other colors (C, M, and Y) equal to 0%.

  • 6. Use the right values for black elements

    When setting up black text, thin lines and small elements, use pure black, (i.e. C = 0, M = 0, Y = 0, K = 100). Text, thin lines, and small elements in pure black color should be set to overprint to avoid white gaps around the text. It will give a solid edge to those elements.

  • 7. Use maximum 2 colours for lines that are finer than 2 pt

    If lines are 2 pt thick or less, use only 1 or 2 colours. 4 colours may be used for thicker lines.

  • 8. Convert all fonts to outlines, or embed them in your file

    To avoid issues with fonts when submitting your file(s), make sure to convert fonts to outlines, or to embed all fonts when saving to PDF.

  • 9. Save and upload your artwork files as PDF/X-1a

    The best format for submitting print-ready files is PDF, under the PDF/X-1a standard. Where possible, submit your files in PDF format. See why PDF/X-1a is the right format for printing.

  • 10. Check for overprint

    Make sure that no elements are set on overprint, unless you need them to be.

Templates

Our free templates provide you with all the information you need to correctly prepare your artwork files for printing. Simply download the template that matches your desired product configuration.

FAQ

If you have any questions about the product and ordering process, please have a look at our Frequently Asked Questions (FAQ) Click here!. If can't find your question in our FAQ section, you can reach our friendly customer support on +603 7890 1347.

  • 1. What is the fastest delivery for ?

    The fastest delivery time for is undefined. Please note that you have to submit your order before 11:00 AM (AEST). Late payment or upload of your artwork might further delay your order. If you select Online Proof or Digital Proof Print during the checkout process, the production will only begin after your approval.

  • 2. Which production techniques are used?

    Depending on the quantity that you order, we use either digital or offset printing. In any case, we rely on the most technologically advanced printing equipment to guarantee the highest printing quality for our business cards.

  • 3. How will my product be delivered?

    All of our products are delivered in a securely packed cardboard box.

  • 4. I can't find what I'm looking for. Can I request a quote?

    If you can't find what you need, please call our customer service team at the above-mentioned number to help you place an order. You can also request a quote from our customer service team for special product configurations that are not available on our website.

  • 5. How can I upload my files?

    If your artwork contains more than one page, you can either upload a single file which contains all pages, or upload separate files each containing one page. Your file(s) can be uploaded either before you checkout and pay, or after. Please note that uploading files late might result in a moved expected delivery date.

  • 6. Which formats can I upload?

    The best format for submitting print-ready files is PDF, under the PDF/X-1a standard. Learn how to save your artwork using PDF/X-1a standard in Adobe Illustrator. However, you can also upload your file in JPEG, PNG, PSD, EPS, TIFF or AI format for an additional fee of RM 25.00. Our graphic designers will then convert your file into a print-ready PDF file.

Guides and Tools

Everything you need to know to get your Artwork ready

Please follow our artwork preparation guidelines to ensure that your artwork file is set up correctly.

  • 1. Add 3 mm of bleed

    During the production of paper products, slight cutting imperfections are to be expected - cutting can be off by a couple of millimeters from the cutting line. To allow leeway for such imperfections, you should add 3 mm of bleed on all edges of your artwork. Make sure all colors, background pictures, and elements extend to the edge of the bleed area, to avoid the appearance of white borders on certain edges after cutting. Learn more how to set up the bleed here.

  • 2. Keep your content within a 3 mm safety margin

    To ensure that no important elements (text, graphics, images) get cut off from your paper product, make sure to keep such elements at least 3 mm away from the edge of your finished product dimensions. Click here to know how to set up 3 mm safety margin.

  • 3. Use CMYK colour mode

    Except for silkscreen and pad printing, files should be prepared in CMYK colour mode. Keep in mind that if the setup is wrong, colours on the finished product may differ from the file you sent. Here is how to set your artwork to CMYK colour mode in Adobe Illustrator.

  • 4. Use an image resolution of at least 300 DPI

    To avoid blurriness, use only images and graphics that have a resolution of 300 DPI or more at actual size. Before sending your files, make sure to embed your images into the file. Read more about how to check the resolution of your assets.

  • 5. Use the right values for grey elements

    When setting up grey elements, set the black color (K) to a percentage between 0 and 100, and keep all other colors (C, M, and Y) equal to 0%.

  • 6. Use the right values for black elements

    When setting up black text, thin lines and small elements, use pure black, (i.e. C = 0, M = 0, Y = 0, K = 100). Text, thin lines, and small elements in pure black color should be set to overprint to avoid white gaps around the text. It will give a solid edge to those elements.

  • 7. Use maximum 2 colours for lines that are finer than 2 pt

    If lines are 2 pt thick or less, use only 1 or 2 colours. 4 colours may be used for thicker lines.

  • 8. Convert all fonts to outlines, or embed them in your file

    To avoid issues with fonts when submitting your file(s), make sure to convert fonts to outlines, or to embed all fonts when saving to PDF.

  • 9. Save and upload your artwork files as PDF/X-1a

    The best format for submitting print-ready files is PDF, under the PDF/X-1a standard. Where possible, submit your files in PDF format. See why PDF/X-1a is the right format for printing.

  • 10. Check for overprint

    Make sure that no elements are set on overprint, unless you need them to be.

Our free templates provide you with all the information you need to correctly prepare your artwork files for printing. Simply download the template that matches your desired product configuration.

If you have any questions about the product and ordering process, please have a look at our Frequently Asked Questions (FAQ) Click here!. If can't find your question in our FAQ section, you can reach our friendly customer support on +603 7890 1347.

  • 1. What is the fastest delivery for n?

    The fastest delivery time for n is d. Please note that you have to submit your order before 11:00 AM (AEST). Late payment or upload of your artwork might further delay your order. If you select Online Proof or Digital Proof Print during the checkout process, the production will only begin after your approval.

  • 2. Which production techniques are used?

    Depending on the quantity that you order, we use either digital or offset printing. In any case, we rely on the most technologically advanced printing equipment to guarantee the highest printing quality for our business cards.

  • 3. How will my product be delivered?

    All of our products are delivered in a securely packed cardboard box.

  • 4. I can't find what I'm looking for. Can I request a quote?

    If you can't find what you need, please call our customer service team at the above-mentioned number to help you place an order. You can also request a quote from our customer service team for special product configurations that are not available on our website.

  • 5. How can I upload my files?

    If your artwork contains more than one page, you can either upload a single file which contains all pages, or upload separate files each containing one page. Your file(s) can be uploaded either before you checkout and pay, or after. Please note that uploading files late might result in a moved expected delivery date.

  • 6. Which formats can I upload?

    The best format for submitting print-ready files is PDF, under the PDF/X-1a standard. Learn how to save your artwork using PDF/X-1a standard in Adobe Illustrator. However, you can also upload your file in JPEG, PNG, PSD, EPS, TIFF or AI format for an additional fee of RM 25.00. Our graphic designers will then convert your file into a print-ready PDF file.