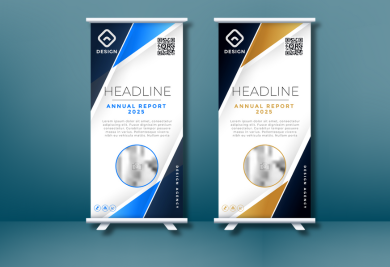
Today, QR codes became a popular element to be integrated into most marketing and promotions. They can be integrated into pretty much any type of printed product. At Gogoprint, we offer a wide range of products for you to print QR codes with, such as business / name cards, flyers, leaflets, posters, stickers and many more!
Printing QR codes however, requires a few set-ups to ensure that code works for your customers. An unscannable QR code is something you do not want to happen in your marketing campaign. Which is why here in this article, we will talk about the DO’s and DON’Ts when printing QR codes, so that you can have professional-looking QR codes that are also scannable for your clients. Read on to find out! :)
DO
1. Set the Right Size
Just like font size, QR codes need to be in the right size to be “readable”. Be sure to make your QR code stand out so your customers will notice it. Furthermore, tiny QR Codes tend to be unscannable. When printing on small mediums such as business cards, the smallest QR codes can go is around 1.5 cm x 1.5 cm.
If you are not sure about the size, you can try to test scan your QR codes on actual print size to see if it works or not. Otherwise, you can simply opt for bigger QR codes to avoid “accidents”.

2. Use the Right Material
If you’re printing with QR codes, then you need to consider the material as this is really important. QR codes are almost unscannable with reflection or transparency. With that in mind, this means spot varnish, gloss lamination, transparent business cards, silver stickers and more are not recommended with QR Codes. Consider these factors when choosing your materials and be sure to test scan your QR code when you have a chance to.

3. Motivate Scanning
Slapping one QR code alone on your artwork and calling it a day might not be a good idea. Keep your clients or customers engaged by motivating them to scan your QR code. For example, adding phrases like “Scan to find out more” into your design can get more users to scan your code than a lonely QR code.

4. Check Your Links
Whenever you generate a QR code, be sure that the link is correct and up to date with where you want to lead customers to. You wouldn’t want people to scan your code just to find outdated content or broken links after all.

DON’T
1. Go Overboard with the Design
While it is great to get creative with QR codes, be careful not to over customize your QR codes to the point of it being unrecognizable. For example, your colors should not be too light and you should avoid adding too many elements into the QR code. In other words, your designed QR Code should still look like a QR Code as complex designs are hard to detect by scanning apps.

2. Overcrowd Your QR Codes
Keep in mind that having too many QR codes close to each other can “confuse” scanning apps, which can lead people to scan the wrong code. If you want to have multiple QR codes in your design, then be sure to place them further away from each other to avoid scanning issues.

3. Use Low-quality Pictures
As we mentioned in our artwork checklist, using low resolution images is a no-no, this is the same with QR codes as well. Avoid blurry QR codes so you can have clear code on display in any media. While high resolution raster files like JPEGs or PNGs work just fine, it is even better if you opt for vector files so you don’t even have to worry about image quality. In the end, a sharp QR code not only makes it easy to scan, it makes your printed product all the more professional!

4. Forget to Test the Codes
Finally, don’t forget to test your QR code when everything is set and done! The easiest way to test scan is by printing your QR code in actual size through your office printer. You can request proof from your printer as well to test scan the QR codes. If the scanning is successful, then you’re good to go!

Wrap Up
By referring to our DO’s and DON’Ts, you can now make sure that your QR code is professionally printed with Gogoprint! With our wide range of print materials, you can print your QR codes on pretty much anything we have! And if you still have more questions about how to prepare your artwork, feel free to contact us or check out our artwork checklist blog here.


